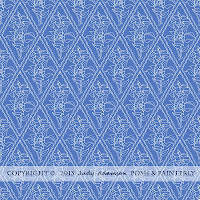
In earlier posts we’ve looked at the various ways to categorise patterns. We then moved on to learn how to create simple block repeats from your paintings in Photoshop, including the slightly more complex ones that need some tidying up at the end to hide the ‘seam’.
 Last month I gave instructions for half-drop and brick repeats and now we’re going to see how to make my favourite kind of repeat, the Diamond or Ogee Repeat. I was very frustrated by the lack of information on the internet when I wanted to make an ogee repeat. But eventually I found a way that works beautifully, using the instructions for a diamond repeat.
An ogee is simply a traditional shape for use in patterns, a bit like a diamond that has been squeezed at each end and rounded in the middle. It’s a shape that has featured in traditional architectural mouldings and so on for many years. The first time I ever heard the word was when an architect used it to describe the shape of the new guttering we would need in the refurbishment of our Edwardian home!
Here we go –
1. You will need to start with a motif that is either ogee-shaped or diamond-shaped. Scan, clean/tidy up and make the background transparent:
3. Write down the image dimensions in pixels.
4. Making sure you're working with the original, un-hidden copy of the motif:
Filter > Other > Offset – check ‘wrap around’.
5. Halve the dimensions and enter the figures in the boxes > OK.
6. Now comes the magic!
Unhide the duplicate you made by clicking on the eye.
8. Adjust image size if too big for repeat..
9. Edit > Define Pattern.
10. New file > Edit > Fill – choose the pattern you’ve just defined. Ta-dah!
One of the reasons I like this kind of repeat is that, by its very nature, it results in an evenly balanced pattern, with a slight diagonal movement in each direction - easy on the eye!
 |
| It's not too hard to see the Ogee shapes in this pattern |
 |
| But although it's hard to see the Ogee shape in this one, I assure you it's there! |
To make it easier to see the way the pattern works, some of the patterns I've shown are hand-drawn and scanned into Photoshop rather than painted patterns. But, of course, the same principle applies whatever medium you use.
I hope you'll find these instructions useful - learning to make an ogee- or diamond-shaped repeat, certainly opened up lots of possibilities for me!
Click
to download a .pdf of this post,
condensed into 4 pages
in case you want to print it out.


10 comments:
Thanks for this tutorial, love it! At the moment I'm trying all in PS, so this is really worth to do!!
Hi Miranda - I'm really glad this can be helpful! Don't forget that if you have any problems with my instructions, you can always let me know and I'll try to find out where I've gone wrong :)
I'm using PS all the time because most of my patterns start off as hand painted.
Nice tut Judy! thank you :)
Hi Brenda - thank you for your comment. I expect you remember my frustration when I was trying to find a way to do this, back in the spring?
This is great Judy, thanks! I have made a diamond rpt which is for screan printing and am wondering if it has to be a square shape in order to join seamlessly above and below. How does a rectangle ie diamond end up creating a square rpt? this has me stumped. your example rpt is a square but it doesn't look like it will line up if you tile it vertically. I hope you can follow what I'm confused about. Nettie
Hi Nettie - thanks for your comments.
I'm not absolutely sure what you mean because the 'tile' was rectangular and I only used a square blank 'canvas' in photoshop to fill with the tiles. I could equally well have used a rectangular 'canvas'. I hope that answers your question? If not, please do say so.
BTW I used to screenprint by hand onto fabric many years ago, long before Photoshop was even around. I had a huge table and lots of lengths of black thread were involved to get the repeats right! :)
Thank you! So clear and so very, very helpful.
Glad it's helpful :)
Judy, lots of thanks for sharing! Great post and patterns.
Hi Julia - thank you for your comments. Glad you enjoyed it! :)
Post a Comment